
[wordpress/custom widget]
워드프레스 (사이드바)커스텀 위젯 만드는 법.
// 위젯 만들기 (1) : WP_Widget 상속 받기 class brv_link_btn_widget extends WP_Widget { function __construct() { parent::__construct( // Base ID of your widget 'link_btn_widget', // Widget name will appear in UI __('link_btn_widget', 'link_btn_widget_domain'), // Widget description array( 'description' => __( 'Sample widget based on WPBeginner Tutorial', 'link_btn_widget_domain' ), ) ); } // Creating widget front-end public function widget( $args, $instance ) { $url = $instance['url'];// apply_filters( 'widget_title', $instance['title'] ); $title = $instance['title']; // before and after widget arguments are defined by themes echo $args['before_widget']; // 위젯 타이틀 // if ( ! empty( $title ) ) // echo $args['before_title'] . $title . $args['after_title']; // 위젯 내용 // This is where you run the code and display the output // if( !empty($url) ): echo '<div id="brv-link-btn-form" >'; // endif; echo '<a href="'.$url.'" class="brv-link-btn-widget" >'; ?> <div class="brv-link-content"> <?php echo $title; ?> </div> <?php echo '</a>'; // if( !empty($url) ): echo '</div>'; // endif; ?> <?php echo $args['after_widget']; } // [관리자 화면>위젯] form // Widget Backend public function form( $instance ) { if ( isset( $instance[ 'title' ] ) ) { $title = $instance[ 'title' ]; } if ( isset( $instance[ 'url' ] ) ) { $url = $instance[ 'url' ]; } // Widget admin form ?> // url, title 두개의 인자값을 받기 위해 html코딩 <p> <label for="<?php echo $this->get_field_id( 'url' ); ?>"><?php _e( 'url:' ); ?></label> <input class="widefat" id="<?php echo $this->get_field_id( 'url' ); ?>" placeholder="http://example.com" name="<?php echo $this->get_field_name( 'url' ); ?>" type="text" value="<?php echo esc_attr( $url ); ?>" /> </p> <p> <label for="<?php echo $this->get_field_id( 'title' ); ?>"><?php _e( 'Title:' ); ?></label> <input class="widefat" id="<?php echo $this->get_field_id( 'title' ); ?>" name="<?php echo $this->get_field_name( 'title' ); ?>" type="text" value="<?php echo esc_attr( $title ); ?>" /> </p> <?php } // 인자 값을 작성하고 확인 버튼 눌렀을 때 // 새로운 값으로 적용 시키기 // Updating widget replacing old instances with new public function update( $new_instance, $old_instance ) { $instance = array(); $instance['url'] = ( ! empty( $new_instance['url'] ) ) ? strip_tags( $new_instance['url'] ) : ''; $instance['title'] = ( ! empty( $new_instance['title'] ) ) ? strip_tags( $new_instance['title'] ) : ''; return $instance; } } // Class wpb_widget ends here // 위젯 등록 함수 작성 function link_btn_load_widget() { register_widget('brv_link_btn_widget'); } // 위젯 초기화 훅에 위젯 등록 함수 입력 add_action('widgets_init', 'link_btn_load_widget');
그럼 위젯 생성 완료
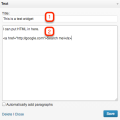
적용은 보통 위젯 적용하는 방법과 동일하게!


'개발일기 > PHP,워드프레스' 카테고리의 다른 글
| 워드프레스(wordpress) ssl작업 (0) | 2019.02.04 |
|---|---|
| 워드프레스 Ajax통신 후 주의 할 점( 결과 값에 0이 붙는 이유 ) (0) | 2019.02.01 |
| [워드프레스] 회원가입/로그인 ultimate member 플러그인 로그인 후 페이지 설정 하기 + 훅(hook) 이용 방법 추가 (3) | 2019.02.01 |
| [워드프레스/woocommerce] 우커머스 특정 금액이상 '무료 배송'을 지정한 경우, 무료 배송만 보이게 하기 (0) | 2019.02.01 |
| [wordpress/multisite] 워드프레스 멀티사이트 설치하기 (0) | 2019.01.09 |


